Beginner's guide · Help
Desktop guide
Make your own PCOC on a Linux computer with the PCOC Hike app. You need no Bitcoin and no prior Nostr account. Linux only for now. Click through the steps below; each picture shows where to press. After this, the phone guide shows how to sign in from your phone.
-
Install the app
You need a Linux computer with Flatpak set up. Download
pcoc.flatpakfrom Demonstrations. Open a terminal in the folder where you saved it and run these two lines (the same steps as on Demonstrations and in the app's README):flatpak install --user ./pcoc.flatpak flatpak run app.pcoc.HikeThe first install also downloads the GNOME runtime from Flathub, so it can take a few minutes.
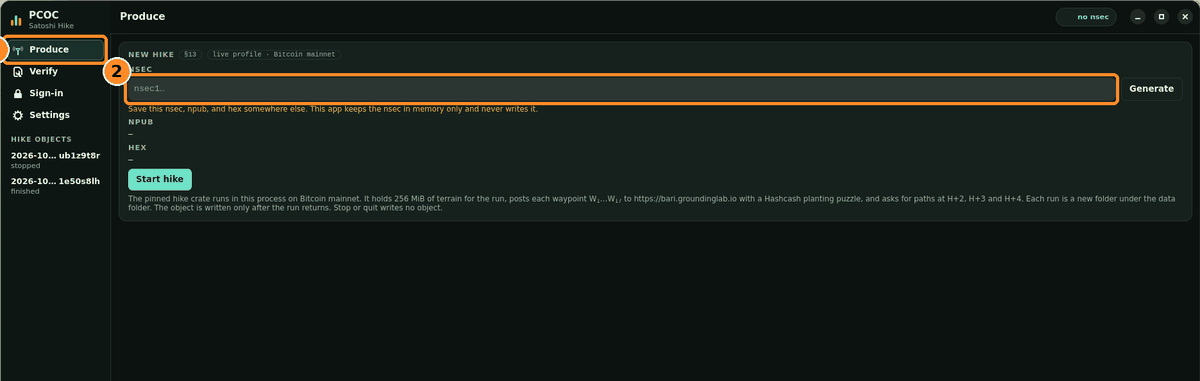
The app opens on Produce (1). The NSEC field (2) is empty until you add a key. -
Make a key
Your PCOC belongs to a key. Press Generate to make a new one. The NSEC field fills in, along with an NPUB line.
Copy the nsec and keep it somewhere safe, such as a password manager. The app never writes it to disk and forgets it when you close the window, and you will need it again to sign in.

Press Generate (1), save the key, then press Start hike (2). The nsec is hidden in this picture. -
Start the hike
Press Start hike. The app switches to the live view. Within a few seconds the Gossip panel shows a connected peer and a header height: the app is asking Bitcoin peers for the latest block, which is where the hike starts.
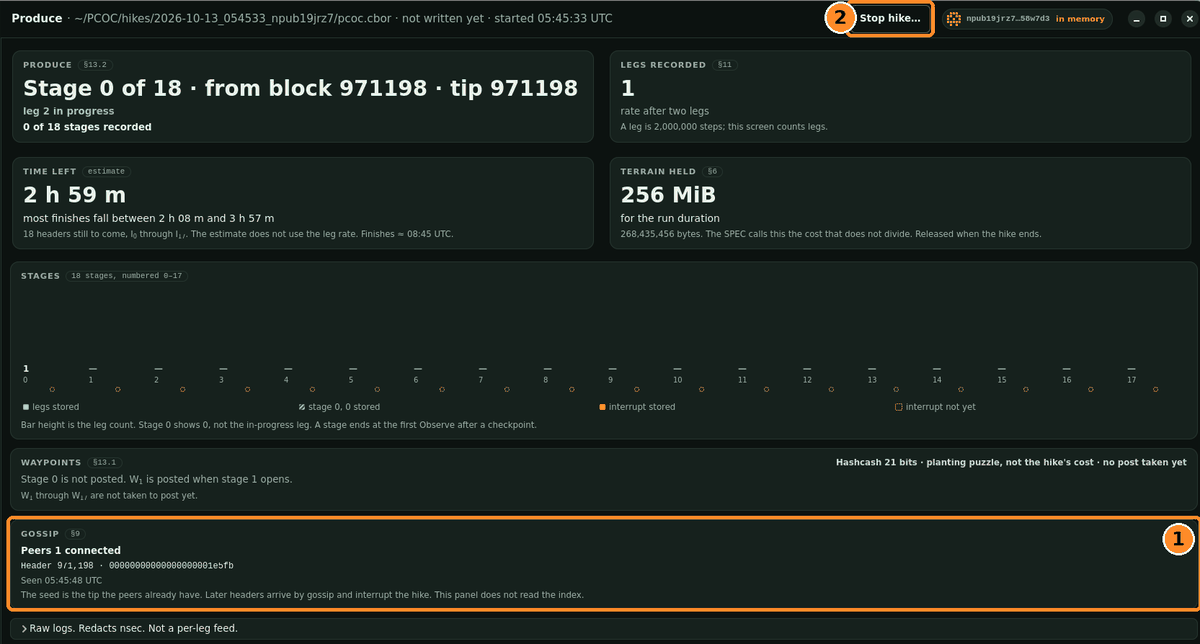
The Gossip panel (1) shows peers and the latest block. Stop hike… (2) cancels the run. -
Let it run for about 3 hours
A hike records 18 stages, and a full run takes about 3 hours. The top card counts stages recorded, and Time left gives an estimate. You can use the computer meanwhile; just leave the app open and the computer awake.
Stop hike… asks first: Stop hike ends the run without making a PCOC, and Keep recording carries on.
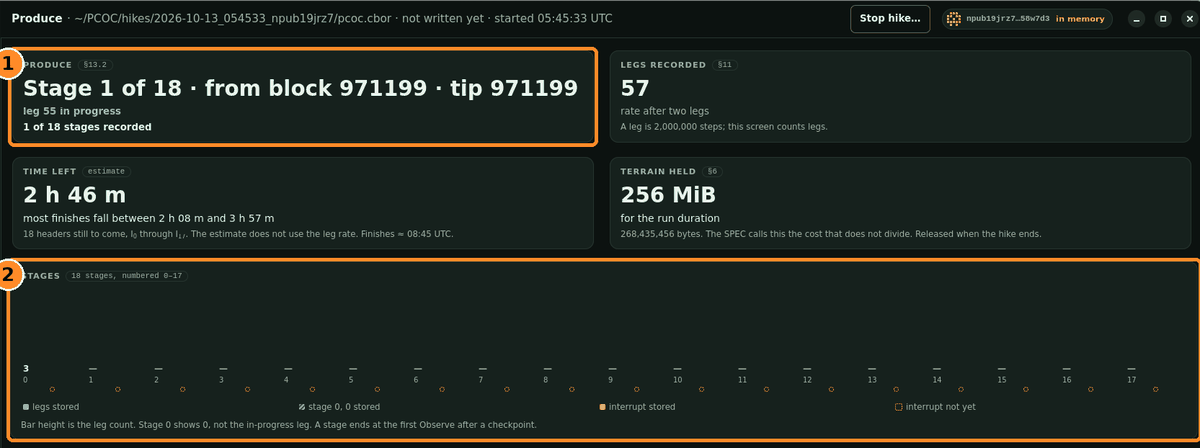
Progress: “N of 18 stages recorded” (1) and the Stages bar (2). -
Your PCOC is ready
When the hike finishes, it shows as finished in the left column. Click it any time to come back here. Three buttons do the rest.

Verify this PCOC (1), Send to my phone (2), Sign in with it (3). -
Verify this PCOC
Press Verify this PCOC. The Verify screen opens with your file already chosen; press Verify. After a few seconds it shows the checkpoints, stages, span and rate. Save record keeps a copy of the result. To check a different file, press Open a PCOC….

Open a PCOC… (1), the result (2), and Save record (3). -
Sign in with it, or send it to your phone
Sign in with it opens the Sign-in screen with your nsec and PCOC already filled in. Press Open sign-in page, start a sign-in on the website, copy the link it gives you, and paste it into LINK.
Send to my phone sends the file to your own key as a private Nostr message, so the phone app can pick it up. The phone guide continues from there.
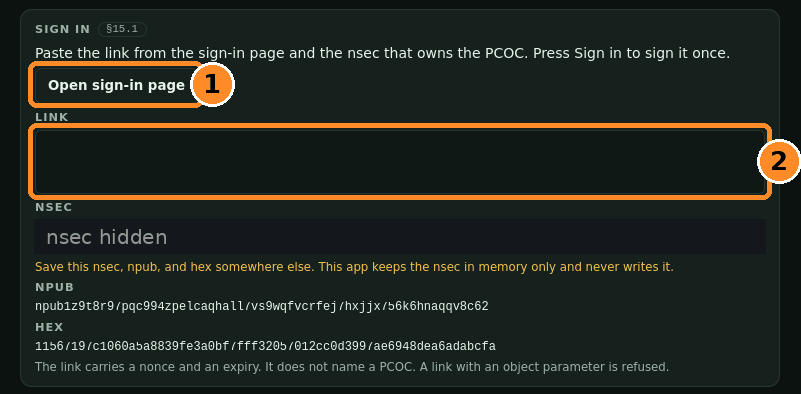
Open sign-in page (1), then paste the link (2). The nsec is filled in for you and hidden here.
Settings lets you pick the Data folder where hikes are saved (Choose…, default ~/PCOC/hikes) and switch the theme. You can leave everything else as it is.

Next: your phone
Sign in from Android with the phone guide. All guides are on the Help page.